ADA Dock Systems

Reliable ADA Dock Systems
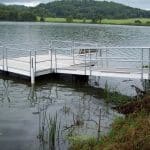
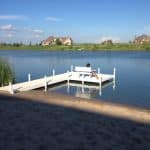
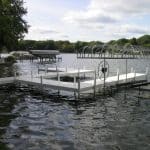
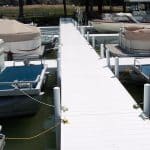
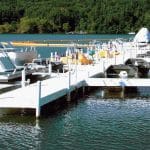
Mod-U-Docks are comprised of pre-built sections of various sizes that fit together, attached by simple brackets. Modular construction makes installation easier. It also helps maximize configuration possibilities for boat docks and marinas with multiple finger piers and boat slips. This makes Mod-U-Dock great not only for private, residential docks but also for campground docks, homeowner association (HOA) and condo docks, industrial use, marinas, and parks and public/government use docks.
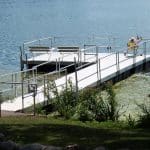
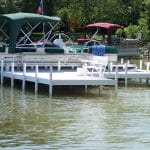
We offer ADA Dock Systems with low slope gangway or ramp entrance, ADA compatible handrails, slip-resistant surfaces, and adequate room and width for wheel chairs and turn-around.
Check out Mod-U-Dock today for all your residential or commercial dock needs.
Proudly Made In The USA
Premier ADA Dock Systems
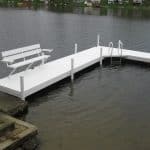
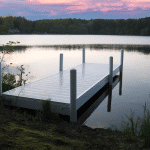
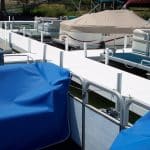
Designed for aesthetic appeal, these rugged, top quality boat docks are great for both residential and commercial use. Docks come in both stationary and floating; the best dock for you is dependent on site conditions.
For ADA Dock Systems, gangway slope is dependent on length of gangway and incline to be transversed, keeping in mind water fluctuations. Mod-U-Dock’s ADA handrails take the standard aluminum powder coated handrails one step further by adding a wheel chair curb at bottom. ADA handrails are available upon request.
Contact us today for your free catalog and to get started building your new ADA Dock Systems.
Check out our Facebook page to see some of our work.

The Installation Process
Mod-U-Dock modular docks are designed to be easy to install and DIY friendly. Installation by section makes assembly easy for seasonal docks or permanent installation if appropriate. Basic hardware is limited to only a few types of brackets: outside corner, straight, and inside corner(s).
Modules are connected by brackets where they join at the corners. The leg post goes down though a sleeve in the bracket and is secured in place with a set screw. Put the pipe through the bracket sleeves with the footpads on the bottom before you go into the water, so they can just be dropped down when in place.
Start with the module closest to shore, and work out from there by attaching modules one by one. You can float out the sections via inner tube or something similar. When you’ve got it all set up, the post covers snap on over the pipe or post caps go on the top. Reverse process for removal as necessary.
See complete instructions here. We are also available for installation help via phone including evenings and weekends.
The general process is as follows. Insert float plugs (don’t over tighten) and install floats. Install splines. Install module fastener kits (K/U bolts), and brackets, both hand tight. If there is a gangway or module with hinge kit, that can be staged and assembled separately. See floating dock instructions here.
For pilings, attach auger feet and secure with bolts. Insert auger foot through the piling bracket and lower, remaining vertical. Screw into bottom with pipe wrench, as indicated in instructions.
For removal, just take out pilings or anchoring and float sections to tie off at shore.
Accessories
Install accessories as indicated, and post covers or caps. See additional instructions below or call for assistance as needed.
Shipping
Modules and floats are typically shipped on 4×8 or 4×6 pallets. Pipe of greater length is shipped in separate bundles.
Standard shipping is via common carrier with semi delivery. For unpaved roads or restricted areas, we can ship to the nearest terminal, hardware store, or etc. for your pickup. Hotshot/trailer delivery may be available locally or for an extra charge. With residential deliveries, assuming no equipment on site to unload, receiver should be prepared to break down pallet(s) on the back of truck and hand down pieces separately. Driver is not responsible for unloading.
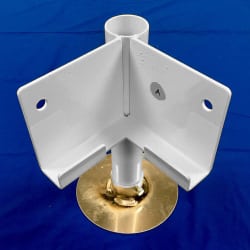
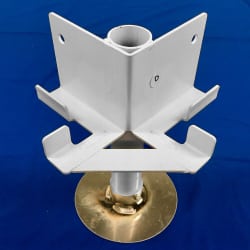
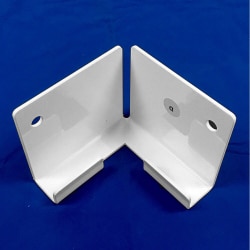
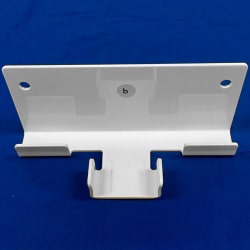
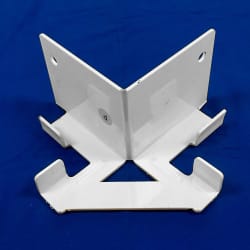
Bracket Types
These are the basic brackets involved in installation: outside corner brackets, straight brackets, and inside corner brackets. A crown/4-way bracket is used if four corners intersect. These innovative brackets are extremely strong and durable, and provide all that is needed to create any dock design.
The basic brackets are the same for stationary and floating docks with the exception that stationary docks are fit with a sleeve through which the post can go through.


No fancy tools are required for installation. Standard tools that are required include:
Socket wrench with 1/2″, 9/16″ & 3/4″ sockets
Crescent wrench or 3/4″ box/open end wrenches
5/16″ Allen wrench – required for float plug and railing installation
24″ Pipe Wrench for screw-in pilings (Floating Docks, as needed)
OPTIONAL – Battery impact wrench for use with sockets. (suggested, but not required).
Featured Dealers & Installers
Mod-U-Dock products are available throughout the U.S. and Canada.
Additional dealers and installers available
Contact Mod-U-Dock to locate a dealer or installer in your area.
California
Green Marine Engineering
Ventura Blvd. Ste 422
Encino, CA
Massachusetts
Inland Docks
32 Monson Road
Wales, MA 01081
Michigan
College Docks
Kalamazoo, MI
(Grand Rapids, Coldwater, Battle Creek, etc.)
Michigan
The Dock Doctor
Coldwater, Michigan 49036
Michigan
2 Men-N-Waders
Waterford, MI 48329
Missouri
Williams Construction
Grain Valley, MO 64029
Oregon
Four Seasons, Inc.
Prineville, OR 97754
Wisconsin
Aquarius Sail
N34 W24041 Capitol Drive
Pewaukee, WI 53075
Wisconsin
Lief Blom Construction
16026 Highway W
Crivitz, WI 54114
Wisconsin
Wisconsin Lake & Pond Resource LLC
N7828 Town Hall Rd
Eldorado, WI 54932